2015/11/07
@mana_catさんのブログでWunderlistを操作するWunderlineというコマンドラインツールがあるのを知り、以前からWunderlistのデータのバックアップを取りたいと思っていたので使ってみました。導入OSはUbuntu 15.04です。はてなブログに投稿しました #はてなブログ
Wunderlistのコマンドラインツール"wunderline"をRaspberry Piに入れてIoTを実現させてみた - Mana B…
https://t.co/rmWTHxOOqA
— Manami Taira (@mana_cat) 2015, 11月 1準備
まずWunderlineを使うにはNode.jsが必要なのでnpmとともにインストールします。
% sudo apt install nodejs npm
Node.jsはnodejsコマンドとしてインストールされるのでWunderlineが使うnodeコマンドを用意します(update-alternativesコマンドを使用してnodejsへのシンボリックリンクを張る)。
% sudo update-alternatives --install /usr/bin/node node /usr/bin/nodejs 10
update-alternatives: /usr/bin/node (node) を提供するために自動モードで /usr/bin/nodejs を使います

% sudo update-alternatives --list node
/usr/bin/nodejs

% sudo update-alternatives --display node
node - 自動モード
  リンクは現在 /usr/bin/nodejs を指しています
/usr/bin/nodejs - 優先度 10
現在の '最適' バージョンは '/usr/bin/nodejs' です。
これでnodeコマンドが使えるようになりました。
% ls -l /usr/bin/node{,js}
lrwxrwxrwx 1 root root      22 11月  3 21:51 /usr/bin/node -> /etc/alternatives/node*
-rwxr-xr-x 1 root root 1462424  3月 27  2014 /usr/bin/nodejs*

% ls -l /etc/alternatives/node
lrwxrwxrwx 1 root root 15 11月  3 21:51 /etc/alternatives/node -> /usr/bin/nodejs*

% sudo node --version
v5.0.0
Wunderlineインストール
準備ができたらWunderlineをインストールします。npmでwunderlineパッケージをインストールするだけなのでお手軽です。
% sudo npm install -g wunderline
アクセストークン取得 & 認証
インストールができたらAPIが使えるようになるためのお作法を少々。
まずWunderlistの連携アプリを作るための登録画面を開きます。
https://developer.wunderlist.com/apps/new
NAME、APP URL、AUTH CALLBACK URLにそれぞれ任意の文字列を入力します。実際にWebアプリを作るわけではないので適当な内容で構いませんが、APP URLとAUTH CALLBACK URLはURL形式である必要があります。
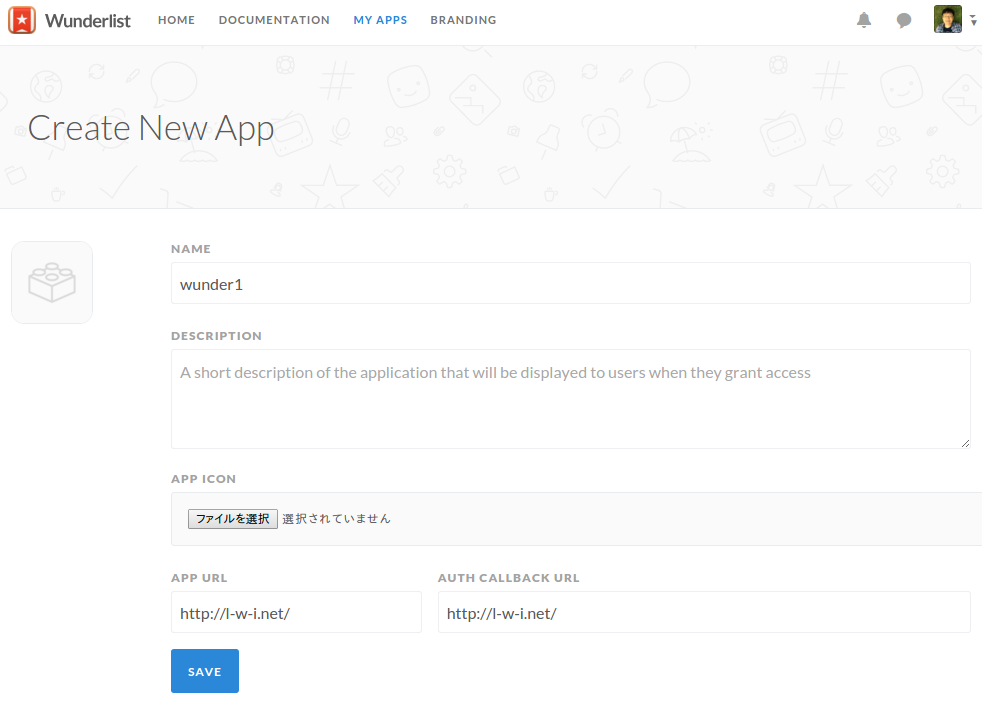
入力したら[SAVE]をクリック、表示されたCLIENT IDをメモしておきます(CLIENT SECRETは不要)。
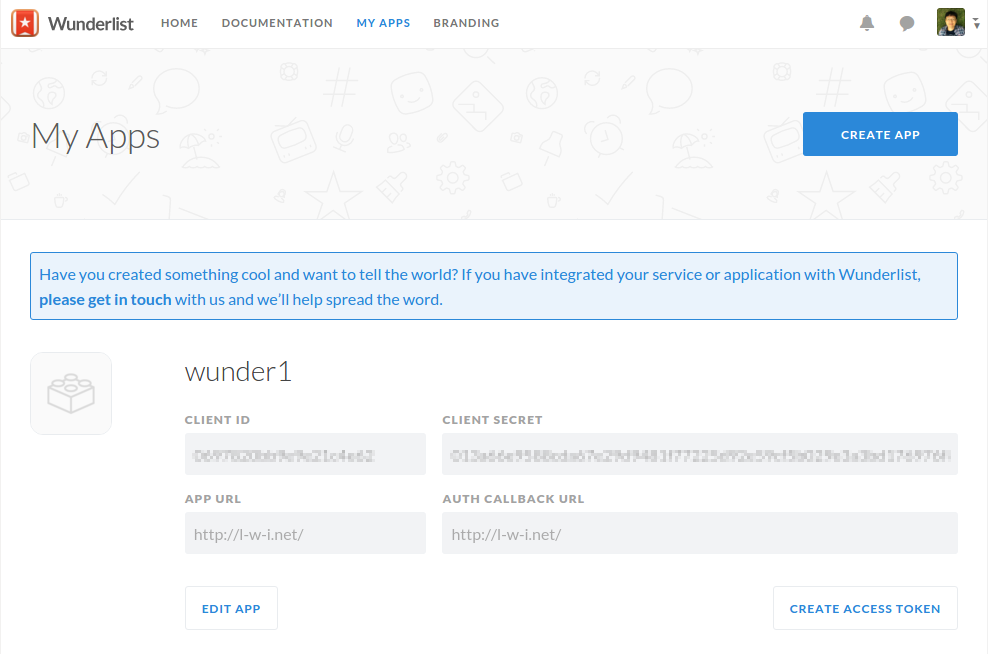
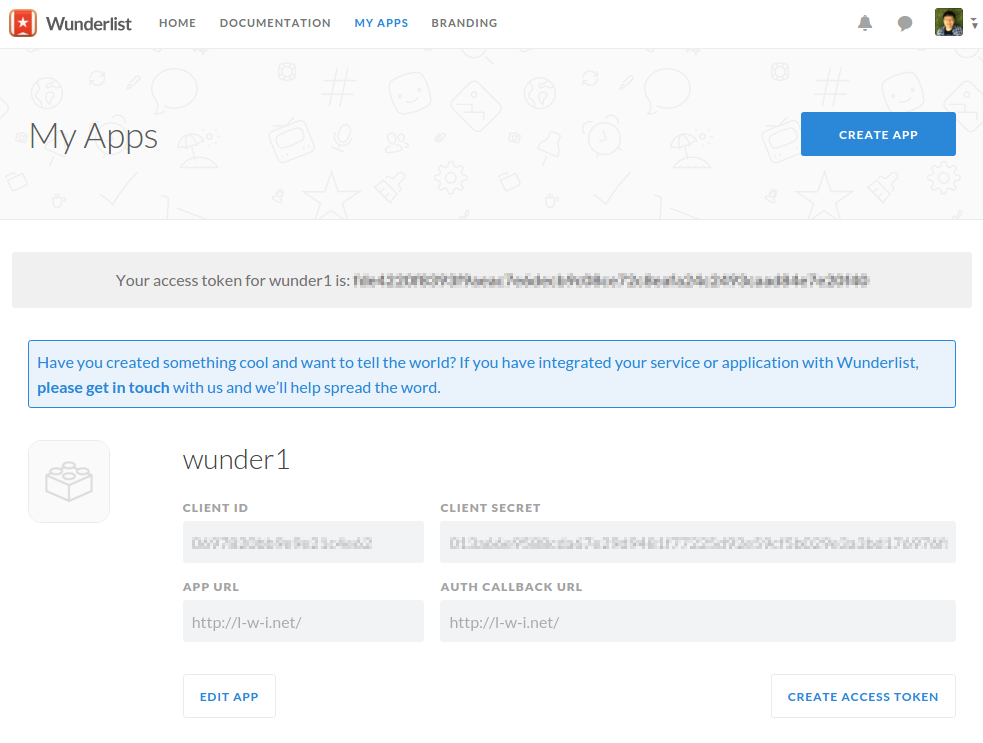
次に[CREATE APP]をクリックするとアクセストークンが表示されるのでこれもメモしておきます。
ここまでいったらあとはコマンドで認証を受けます。wunderline authコマンドを実行して先ほどメモしたCLIENT IDとACCESS TOKENを入力し、「Wunderline has been authenticated」と表示されれば認証完了です。
% wunderline auth
Please create a Wunderlist Application before you proceed, you can do so over
here: https://developer.wunderlist.com/apps/new, once that is done please enter
your access token and client id below.
? CLIENT ID xxxxxxxxxxxxxxxx
? ACCESS TOKEN xxxxxxxxxxxxxxxxxxxxxxxxxxxxxxxxxxxxxxxxxxxxxxxxxxxxx
Thanks xxx, Wunderline has been authenticated.
あとは自由にwunderlineで自分のリストのデータを操作することができます。
データ操作
まずは何かデータを登録してみましょう。wunderline addコマンドを使います。
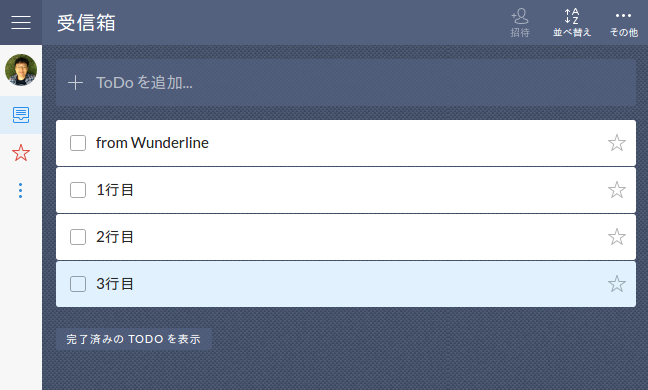
% wunderline add 'from Wunderline'
Wunderlistの受信箱にデータが追加されれば成功です。

addの-sオプションを使うと複数のデータもいっぺんに登録できます。
% cat <<END
> 1行目
> 2行目
> 3行目
> END
1行目
2行目
3行目

% cat <<END | wunderline add -s
> 1行目
> 2行目
> 3行目
> END
wunderline exportコマンドでリスト全体が出力できます。これで僕がやりたかったバックアップが実現します。
% wunderline export > all_list.txt
.................................................

% more all_list.txt
{"exported_at":"2015-11-06T16:28:41.992Z","data":{"user":...
リストは改行なしのJSONデータなので人間の目では読みづらいです。jqコマンドをインストールすればツリー構造で分かりやすく整形してくれます。
% sudo apt install jq

% jq '.' all_list.txt | more
{
  "exported_at": "2015-11-06T16:28:41.992Z",
  "data": {
    "user": {
:
その他いろいろな操作ができるので詳しくはhelpを参照して下さい。
% wunderline help

  Usage: wunderline [options] [command]


  Commands:

    auth            Authenticate Wunderline
    add [task]      Add a task to your inbox
    inbox           View your inbox
    starred         View starred tasks
    today           View tasks due today
    week            View tasks due this week
    all             View all of your tasks
    overdue         View overdue tasks
    search [query]  Search your tasks
    list [query]    Search your lists
    open            Open Wunderlist
    export          Export your data
    whoami          Display effective user
    gc              Delete completed tasks
    set-platform    Set your preferred application platform
    flush           Flush the application cache
    help [cmd]      display help for [cmd]

  Options:

    -h, --help     output usage information
    -V, --version  output the version number
各サブコマンドのオプションは以下のようにして参照できます。
% wunderline help add

  Usage: wunderline-add [task]

  Add a task to your inbox

  Options:

    -h, --help         output usage information
    -l, --list [name]  Specify a list other than your inbox
    --today            Set the due date to today
    --tomorrow         Set the due date to tomorrow
    --due [date]       Set a specific due date
    --note [note]      Attach a note to the new task
    -o, --open         Open Wunderlist on completion
    -s, --stdin        Create tasks from stdin
タスクのステータス変更など細かい操作はできないものの、データの追加・検索、終了したタスクの削除、リスト全体の出力などコマンドラインからひととおりの操作ができるのでいろいろな活用方法が考えられると思います。